Indoor Rowing Posture
Ready to sit up and pay attention?! Posture is a key component of rowing. It helps to produce an effective stroke, strengthen the core and create an aesthetic of effortless grace, whether you’re cruising or crushing it!
Efficiency: In rowing (indoors and on the water) we aim to be as efficient as possible – this generally means being able to get as far as possible with each stroke.
Injury-free: there are lots of ways to generate power in order to max out those metres per stroke but if power is applied in the wrong way it can work against the body and instead of strengthening it, cause injury, especially when repeated over 1000s of strokes.
Posture: good posture allows for both an efficient stroke and a minimised risk of injury, in particular to the back.
Postural endurance: however, sitting up unsupported is hard work and not something we generally need to do for any length of time on a regular basis.
If you are new to rowing, returning from injury or looking to improve your technique it is best to build up gradually with plenty of core work (article coming soon) and patient training, for example:
Start by rowing at light pressure focussing on posture for 5-10 mins.
Progress to longer rows at light pressure or start including sections with more power over 5-10 mins e.g. 20 strokes light, 10 strokes a bit firmer pressure.
Always pause if you feel any discomfort and if in doubt speak to a rowing coach. If they are in doubt they will refer you to a medical practitioner.
A good coach is one who won’t test the limits of their expertise on your potential injury!
So, what is good rowing posture?
Getting started
Sit pretty much on the middle of the seat, not perched on the edge.
You should be right on top of your sit bones with a little bit of your thigh in contact with the front of the seat.
Your pelvis should be neutral and the lower back flat
Avoid your pelvis being tilted under (couch potato style) or ‘sticking your bum out’ i.e. arching your lower back
Do ‘sit tall’ by feeling as if the top of your head is being lifted towards the ceiling. You should feel for a long neck and low, relaxed shoulders.
The Finish
Sit as outlined above with the handle at your lower couple of ribs, then keeping the feeling of ‘sitting tall’ lean back to an 11 o’clock angle. (Your abs have to work a little harder to hold this position – if it’s too hard/uncomfortable keep the height but don’t lean back as far.)

'The Finish' sitting on top of the sit bones at an 11 o' clock angle with a neutral pelvis, flat lower back and shoulders down

Posterior pelvic tilt - Try to avoid a posterior pelvic slump/tilt at the finish
The ‘Power Position’
Move the arms out straight in front of you (more about this coming up) then hinge/rock /swing forward from the hips to a 1’o’clock /’power position’, again keep sitting tall. It may help to think about keeping the head and chest up, but don’t let the lower back arch.
Hamstrings: at this point your hamstrings may object! Only hinge forward to the point you just feel them. If that means you rock forward short of 1 o’clock, that’s fine! Alternatively you could soften your knees a bit. Do NOT be tempted to go for extra reach with the upper back instead! You may have a slightly shorter stroke but over time your hamstring flexibility should improve and in the meantime you’ll be improving your postural strength and endurance.

Forward body / 'power' position at a 1 o'clock angle. Pivot from the hips.

Hold the 'power' position all the way to 'the catch'
The Recovery
Hold the ‘power position’, sitting tall, with shoulders in front of hips as you slide forward all the way to the catch.
Your upper body/shoulders may round a little bit as you come to full slide with shins vertical but there should be no obvious collapse of the upper body or feeling of sinking lower down
Avoid ‘rushing the catch’. If you accelerate forward instead of slowing down to the catch you can cause a whiplash effect which will likely mean you lose the optimum power position.

Avoid over-reaching at the catch.
The Catch
You’re already in the prime position to change direction and maximise your power, hence the term ‘power position’! Your legs, lats and core will engage but no change in posture is needed.
Leg Drive
Initiate the leg drive, again keeping the posture the same. The shoulders are in front of the hips. The hips/seat and handle all move back as one unit.
Avoid heaving the upper body backwards towards the 11 o’clock angle straight off the catch. It can feel satisfying but will put pressure on your lower back and nixes the 60% of power the legs want to generate!
Avoid ‘shooting the slide/bum shoving’! Both terms means pushing the seat backwards but leaving the shoulders behind. You’ll lose core engagement, height and cause discomfort to your back when swinging the body back

Initiate the leg drive keeping the power position still, not by opening up the body angle.

Also avoid leaving the upper body behind, bum-shoving / shooting the slide
Backwards Body Swing
As you reach quarter slide (just before the knees start to flatten) start the backwards body-swing. Keep the core engaged and avoid lifting the shoulders. (Maintaining core engagement at this point is challenging – more on this coming!)
Transition into the backwards body swing as the legs are at 1/4 slide, beginning to flatten

Avoid lifting the shoulders (and hands) into 'the finish'.

Keep sitting tall as the arms begin to pull and the knees straighten
The Finish
Continue the swing back to that 11 o’clock angle you started with, sitting tall on the seat. Having finished the stroke the acceleration will have been carried through to the arms so that the shoulder blades are squeezing together and the abs are engaged. There’s more going on to help maximise the power and efficiency of the stroke but that’s yet more for another time!
Avoid ‘dumping’ into the finish where you let the abs switch off, lose height and let the hips tuck under you. Again, it can feel like the right thing but will in fact cut your stroke short and will make it harder to set up the power position for the next stroke.
Repeat until you feel your posture beginning to weaken. Even if your legs and lungs feel fine, take a break and return when you know you’ll be able to ‘sit tall’ again.

Avoid 'dumping' into 'the finish'.

Finish the stroke, sitting tall, shoulder blades squeezing, ready to hinge forward into the 'power' position again
Improving posture off the rowing machine:
Posture is directly related to core engagement, and to some extent, flexibility, especially of the hamstrings and lower back. There will be another article on this but in the meantime think about sitting or standing up straighter more wherever you are – at work, in front of the T.V’ or waiting for the bus. Try not to cross your legs, keep your neck tall, shoulders down and lower back neutral. If you think of your hips as a bowl of soup you want to ensure you’re not letting the soup spill out of the front or the back of the bowl!
My fave 3 exercises for improved posture:
When I’ve come back from injury, having had kids, or any other break from rowing the following exercises of 10-15 reps x3 every day have helped me strengthen my back (that’s where I personally feel the weakness the most) and improved my rowing-specific body awareness and ability to ‘sit tall’ for longer. Adapt the reps to what suits you and if in doubt seek advice from an exercise professional.
‘Cat-cow’
To establish where the neutral spine is: on all fours, keep the tummy button pulled up and the back flat/neutral spine. Tilt the hips under, round the upper back, separating the shoulder blades and tuck the chin under. Hold for 2-3 seconds. Then tilt the pelvis the other way, lift the head and chest and feel a slight chest down the centre of your torso. Repeat 2-3 times then end in neutral. You may like to check your position in a mirror.

‘Cat-cow’ neutral spine

‘Cat’ - with posterior pelvic tilt

‘Cow’ - with anterior pelvic tilt
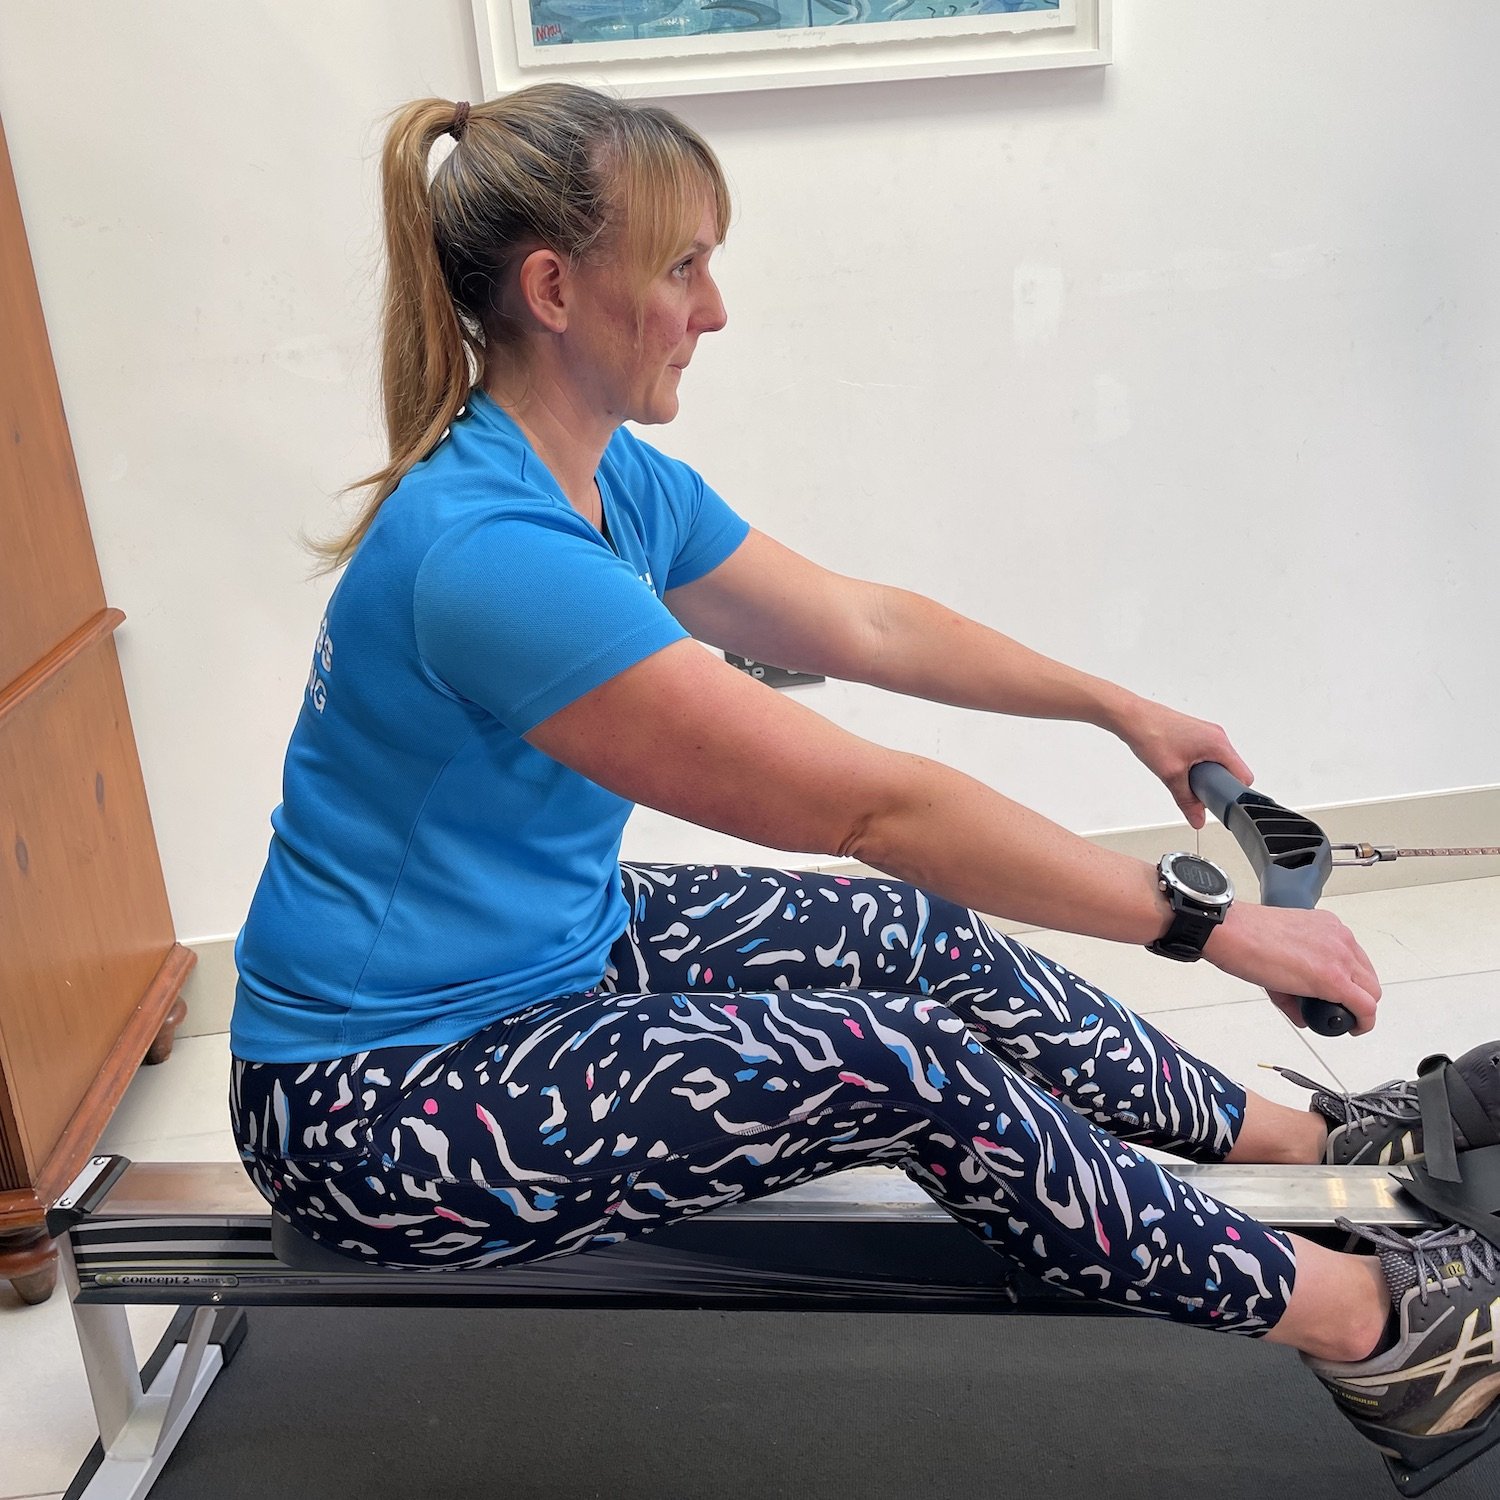
Seated row with band
To strengthen the finish position and open up the chest/counter the ‘laptop hunch’: This can be more comfortable without shoes on. Sit on top of the sit bones, legs out straight (keep knees soft if hamstrings are pulling too much.) Loop a band under the soles of the feet and keep hold of the ends. Lean back to an 11 o’clock angle and adjust your grip so there’s a little bit of tension in the band. Keep sitting tall with core engaged then pull the elbows back, squeeze the shoulder blades together, hold for 1-2 seconds, straighten arms then repeat. Do not let your body swing forward as you pull back.

Seated row with band. Sitting tall engaging abs to help, at an 11 o’clock angle, arms out straight

Draw the arms back, keeping the shoulders down. Squeeze the shoulder blades together . Keep wrists flat and keep sitting tall. Don’t let the body be pulled forward as you straighten the arms again
Back extension
Strengthen the lower back. Lie face down with your elbow out and fingers near your temples. Keeping your eyes looking down (neutral spine) and your feet on the floor lift your head and shoulders off the floor, hold 2-3 seconds, lower fully to the ground then repeat.

Back extension. Start lying face down

Slowly raise your head, shoulders and hands off the floor, keeping your eyes looking down. Feel your lower back gently working. Hold for 2-3 seconds then lower. Stop if uncomfortable